Connecting PC to bb/rpi3 serial console
How to connect your PC to the serial console on the BeagleBone Black or Raspberry Pi 3. The serial console will allow you to view stdout as well as access the Linux shell.
USB-to-TTL serial cable
A 3.3V FTDI cable is needed to access the output. These cables are available from:
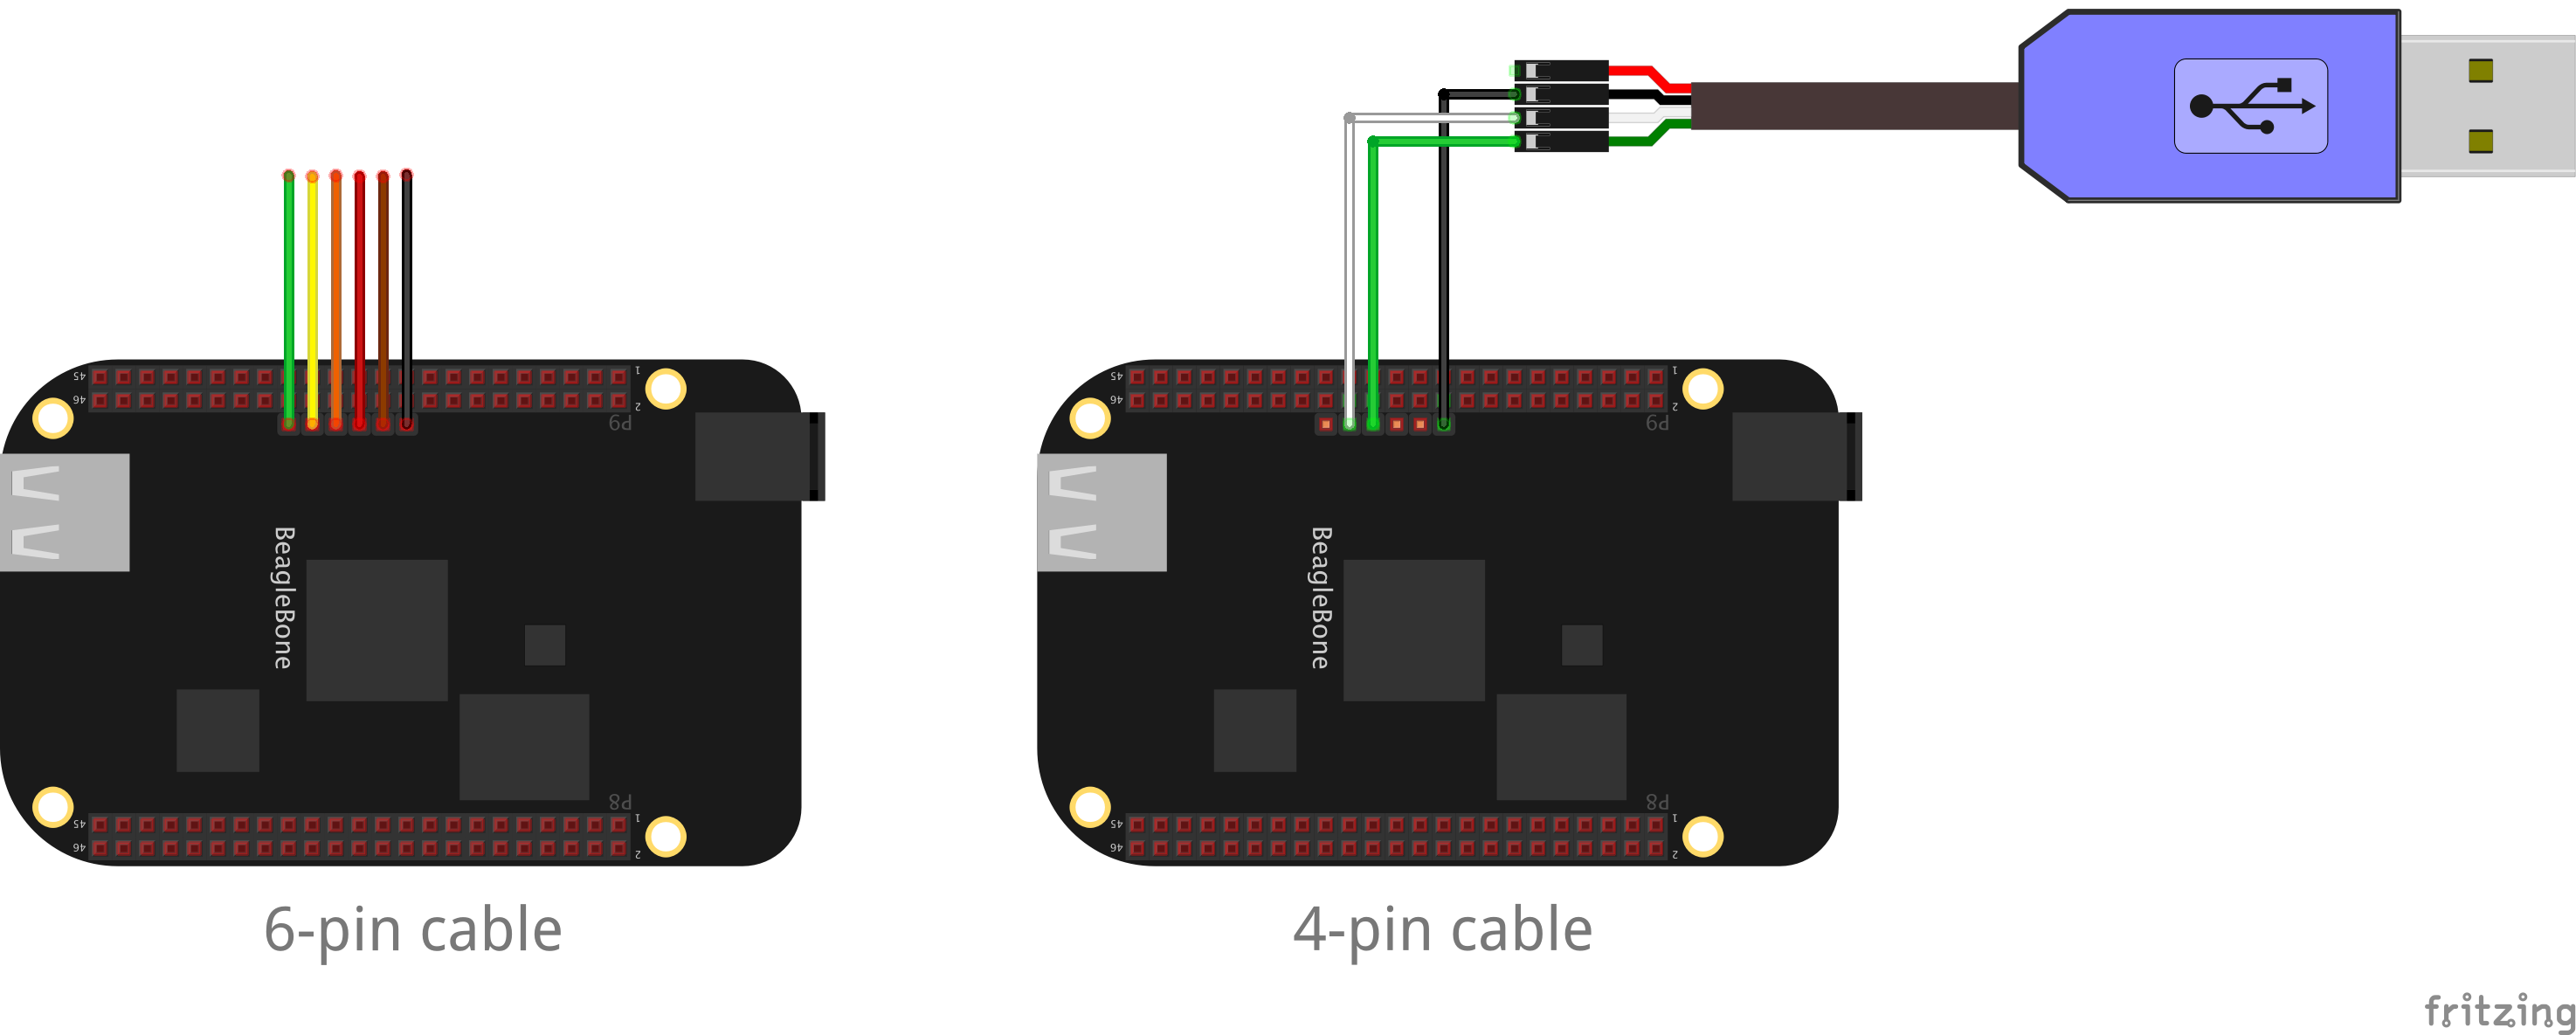
bb – 6pin FTDI cable:
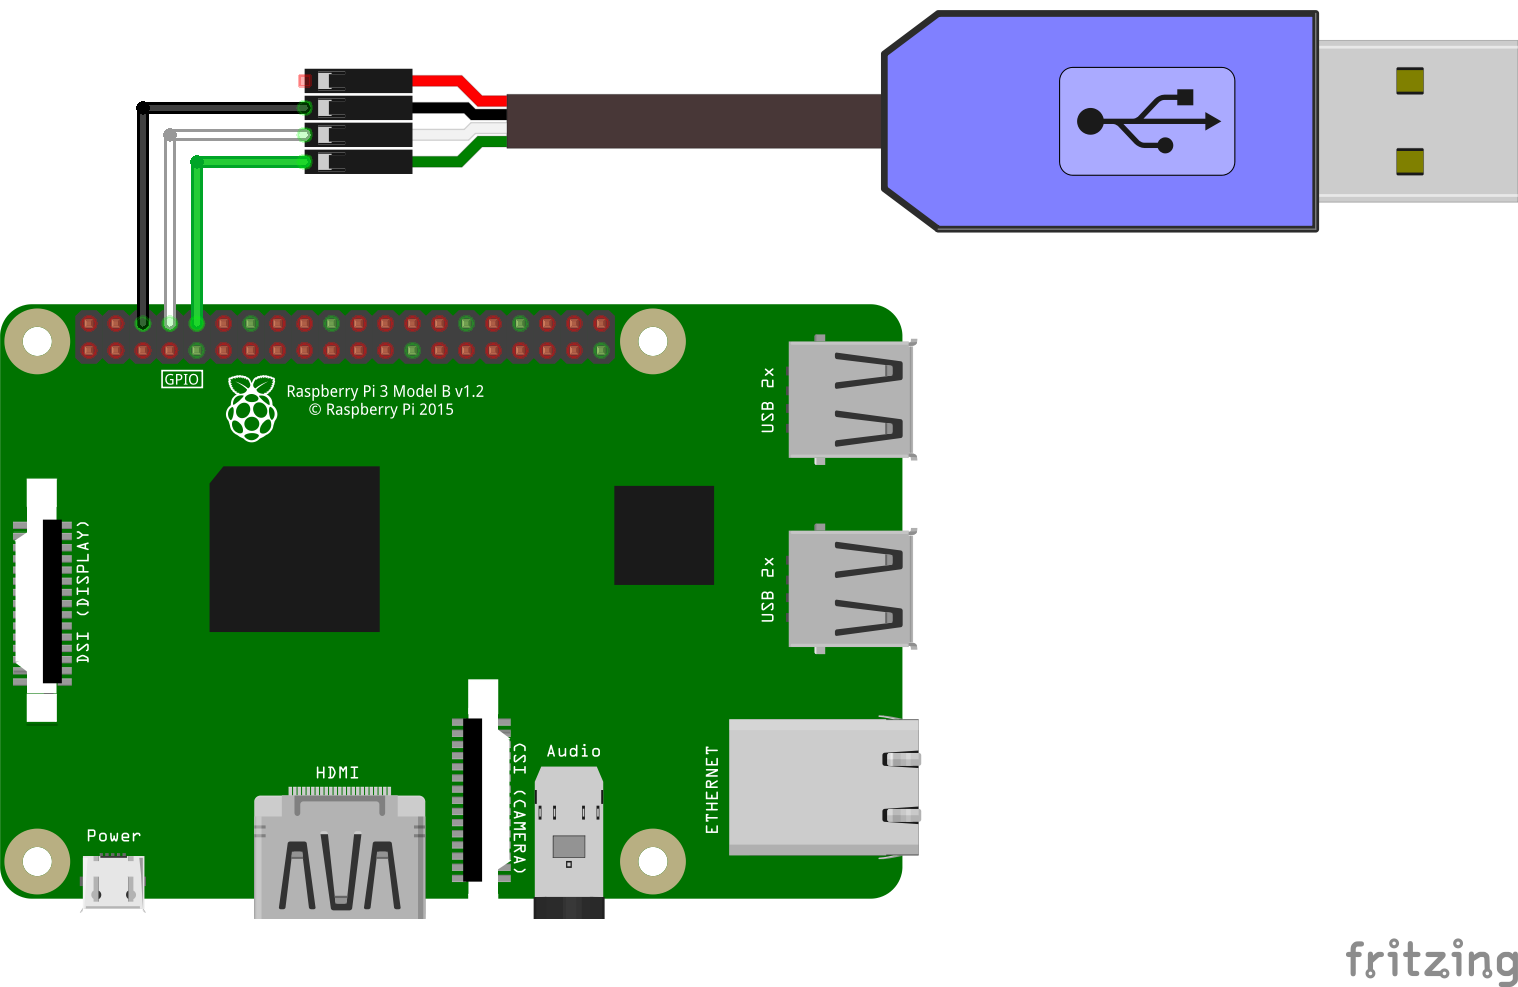
rpi3 – 4pin FTDI cable:
Connecting to Device
bb
The console is configured to output to ttyS0 by default on the bb.
UART ttyS0 is accessible by the 6 pin header labeled J1 on the Beaglebone Black. Pin 1 on the cable is the black wire and connects to pin 1 on the board, the pin with the white dot next to it.
A 4-pin cable may also be used, with only the GND, RX, and TX header pins connected.

rpi3
By default, the rpi3 will use HDMI for the console. To override and use ttyAMA0 you need to modify your faninit.props (make sure to run fan studs asm after):
# Override the controlling terminal (ttyAMA0, tty1, etc.)
tty.console=ttyAMA0
Then the cable can be connected to UART ttyAMA0 via the GND, RXD, and TXD header pins:

Opening a serial session
On macOS and Linux you can use the screen command to open a serial session to the BBB:
$ screen /dev/tty.usbserial 115200The actual device name tty.usbserial will vary. It will typically include usb somewhere in the name. You can use tab completion to search for the correct device. You can also ls /dev before and after inserting your USB cable and see what new port shows up.
Power on your BBB and you should now be able to view the stdout as Linux boots and your application is started.
To access the shell, make sure you configure faninit.props for exit.action and exit.run:
exit.action=hang
exit.run=/bin/sh
With these settings, when your Fantom application exits, or you press Ctrl+C from the console, you will exit to a Linux shell.